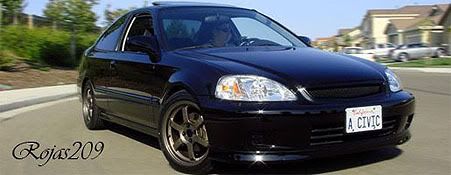
After installing my turbo kit, I wanted a different place for my license plate that didnt block as much of the intercooler. I wish I could go plate-less in the front but a bright blue Civic doesnt exactly blend in.

After looking at the front of the car, I decided a good place to put the plate would be in the lower lip area on the passenger side. I wanted to get it as low as I could without worrying about scraping on inclines. I decided on the passenger side because I didnt want to block any air going to the hot side of the intercooler.
These are the supplies I purchased:
One sheet of 8 x 24 sheet metal.
Two 1 rubber bushings
Two 1 OD stainless washers, ¼ ID
Two 3/8 plastic washer
Two 1 hex head stainless bolts, M6 x 1.0
Two ½ Phillips head stainless bolts, M6 x 1.0
Two stainless nuts, M6 x 1.0
Rust inhibiting primer and black spray paint.


I first cut the sheet down to 8 x 11 ¾. I determined this length by the length of the plate. I went in slightly on each side for a cleaner look. I then got under the
auto and removed 2 of the bolts holding on the front lip. The holes are 7 apart, center-to-center. This is where the bracket will be fastened.

I then went to the sheet metal and drilled 2 holes for the lip bolts and then two more holes for the license plate on the other end. The holes for the lip side I placed 7 apart and aprox. 1 up. To locate the plate holes I just laid the plate down over it and drilled.

It would be nice to have a sheet metal bender about now. I did not have one and had to use my imagination. I place the bend 1-1/2 up. The bend is at the end that the license plate will be bolted to. I gave the bend an angle of about 60 degrees. This will angle the plate down a little more and direct some air up into the grill.
After a test fit, primer and paint, I mounted the license plate to the bracket with the ½ Phillips bolts, the two nuts, and small plastic washers.
For the lip side I cut down the rubber washers so there was enough bolt going through to securely fasten the bracket, but still kept the bracket away from the lip itself. I dont have a measurement for that, youll just have to test fit to your liking.


The 1 washer is for the bolt head side. You can use a smaller one if you want, I wanted more surface area for the bolt to transfer pressure to. I also cut some vacuum line I had lying around into strips and glued them on the lip side to act as a cushion if I did bottom out the bracket.


Bolt it in and there you go!

(Quick note, I made this bracket in the spring and just now decided to do a how to on it. This is why I was unable to take pictues as I was doing it, that and the parts look kinda used. )